Ever snapped a 3D-printed part right where you needed it to hold? A maker going by MagicLAG hit that same wall and found a clever fix: instead of hunting for stronger filament, they gave the print a thin skin of carbon-fiber cloth hidden just below the surface. The result more than tripled the yield strength of a simple hook.
The idea works because most of the stress in a bending or pulling part travels along its outer surface. Long, continuous carbon fibers are fantastic at carrying that load, but the printers that can lay down continuous fiber are pricey. Woven carbon-fiber cloth gives you those long strands for a few dollars, as long as you can get it bonded into the part where the forces are highest.
MagicLAG tested several approaches before landing on a winner. Pausing the print to tuck in loose fiber strands, or ironing strands and cloth into a surface, barely helped at all, because the loose fibers just bent and let the plastic around them crack. Pulling test hooks apart on a load cell told the real story: only the buried cloth made a dramatic difference.
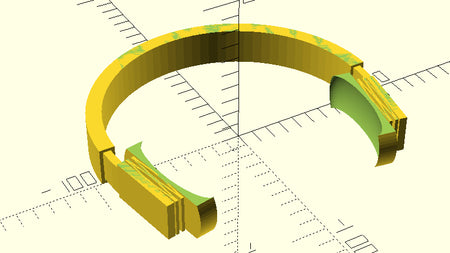
The winning method splits the model into three printed pieces, a solid core and two thin outer shells, with a narrow gap left between them. You lay carbon-fiber cloth into that gap, wet it with a slow-curing epoxy, and clamp the shells back over the core. Skipping the quick-setting epoxy matters here, since a gentler cure keeps the outer surface smooth and the dimensions accurate. A control that glued the shells on with no cloth still beat a plain print, but the cloth-reinforced version was in a different league.
Try it on your printer: Pick a small bracket or hook that always seems to break, split it into a core and two shells in your slicer with about a millimeter of gap, and epoxy a couple of layers of carbon-fiber cloth between them. Wear a mask and gloves, since carbon-fiber dust needs respect. Want the beginner-friendly filament, epoxy, and tool picks to try this at home? Browse the gear and guides at flarelab.com.
Frequently asked questions
Do I need a special printer for this?
No. The whole point of the epidermis method is that it works on an ordinary FDM printer. You print the part in sections, then add the carbon-fiber cloth and epoxy by hand afterward, so no fancy continuous-fiber machine is required.
Is carbon-fiber filament not enough on its own?
It helps in some plastics, but chopped carbon fiber can actually make PLA weaker rather than stronger. A layer of woven cloth bonded near the surface carries load far better than short fibers mixed into the plastic.
What kind of epoxy should I use?
A slower-curing epoxy works best. Quick-setting epoxy sets before it fully wets the cloth and can distort the surface, while a standard-cure epoxy keeps the outer shape and dimensions accurate.
Is carbon fiber safe to handle?
Treat it with care. Cutting and sanding carbon fiber releases fine particles that some studies link to asbestos-like irritation, so wear a mask and gloves and work in a ventilated space.
Inspired by reporting from Hackaday. Rewritten and expanded by Flarelab. Read the original story.