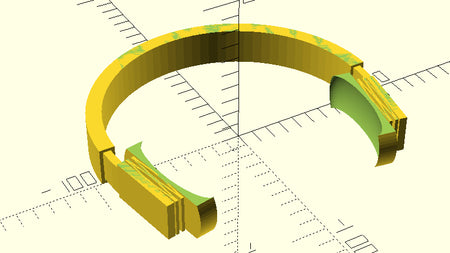
One of the best upgrades for your 3D printer might not come off your 3D printer at all. A maker recently shared a top cover for the Snapmaker U1 that snaps the whole idea of an enclosure down to its simplest form: a flat sheet, a few folds, and some tape. There is a 3D model attached, but it is only a reference shape. Nothing actually gets printed.
Why bother with a cover at all? An enclosure traps the heat your printer already makes, which keeps the air around the print warm and steady. That steadier temperature means less warping and fewer layers peeling apart, especially with materials like ABS and ASA that hate cold drafts. A cover also keeps dust off your build plate and puts a barrier between the hot nozzle and curious hands or pets.
The clever part here is the material. Corrugated plastic, the fluted sheet used for yard signs and often sold as Coroplast, is cheap, lightweight, and a surprisingly good insulator. You can find it at almost any sign or plastics supplier, and it cuts cleanly with a hobby knife. Because the design folds together like a hat, it needs no screws, brackets, or printed clips at all.
Here is the basic idea if you want to try it. Grab a sheet of corrugated plastic and cut out the panel shapes from a flat diagram, either as one big piece or several taped together. Fold the pieces up and over the top of your machine so they clear the extruder, then tape the seams. Want to peek inside? Cut a square and tape clear plastic over it for a window. Leave the front as a lift-up flap so you can reach the print without pulling the whole cover off.
Try it on your printer. The same trick works on almost any open-frame machine, not just the Snapmaker. Measure your printer, sketch a simple box or hat shape, and start cutting. For more beginner-friendly 3D printing guides, upgrades, and filament tips, visit flarelab.com and see what you can make this weekend.
Frequently asked questions
Do I need a 3D printer to make this enclosure?
No. The cover is cut and folded from a flat sheet of corrugated plastic and held together with tape. A 3D model exists only as a reference shape for the cut pattern, so no printing is required.
What is corrugated plastic?
Corrugated plastic, often sold under the brand name Coroplast, is the lightweight fluted sheet used for yard signs. It is cheap, a decent insulator, easy to cut with a hobby knife, and available from most sign or plastics suppliers.
Does an enclosure need to be fully sealed to help?
No. Even a loose-fitting top cover retains heat, blocks drafts, and keeps dust and curious fingers away from the build area. A full seal helps more with warp-prone materials like ABS, but it is not required for everyday printing.
How do I add a viewing window?
Cut a square opening wherever you want to see the print, then tape a piece of clear plastic sheet over the hole. You can also leave a front flap that lifts up so you can reach inside without removing the whole cover.
Inspired by reporting from Hackaday. Rewritten and expanded by Flarelab with original commentary and guidance. Source: Hackaday.