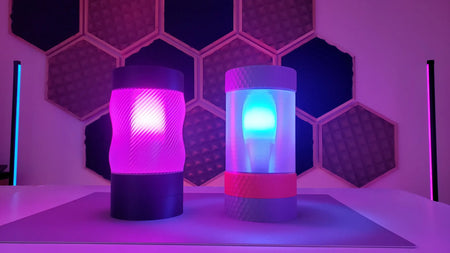
Ever built a glowing LED matrix, only to end up staring at a grid of harsh, blinding dots? A good diffuser enclosure is the whole difference between a project that screams "loose wires on a desk" and a display that looks like it rolled off a store shelf. This 16×16 build is one of the cleanest takes we've seen, and every part comes off your own printer.
The design is a 3D-printed housing for a 16×16 LED matrix — 256 pixels packed into a tidy square — and it's a follow-up to the maker's popular 8×32 enclosure. What makes it special is that the front is built to accept thin stencil sheets, so you can lay letters, icons, or shapes over the grid and completely change the look without printing a single new part.
The little details are doing a lot of quiet work. The grid drops each pixel into its own cell so neighboring colors don't bleed into a muddy blur, and the diffuser panel scatters the light into soft, even squares. Recently the designer re-uploaded some missing STL files and added vented components, which let heat escape so you can run the panel at full brightness without the plastic warping or the LEDs dimming. The ridges on the back plate and the notches on the grid aren't styling — they exist so the pieces line up and clip together on the first try.
Printing it is refreshingly beginner-friendly. Print the grid and back plate in an opaque color that blocks stray light, and print the diffuser in white or natural filament for the most even glow. If you have bright LEDs running hot, reach for PETG over PLA near the panel. Assembly is intuitive: seat the matrix, clip the grid over it, then drop on the diffuser and your stencil layer. The full STL set and a video walkthrough live on the designer's Thingiverse page.
Try it on your printer. This is a perfect weekend print if you want a real, useful result at the end of it. Grab a fresh spool, dial in your first layer, and run the enclosure a section at a time. New to picking the right filament for a job like this? Start at flarelab.com — we're a Philippine 3D-printing shop and blog built to help beginners go from "it kind of works" to "that looks pro."
Frequently asked questions
Do I need special filament to print an LED enclosure?
Standard PLA prints the parts fine, but PETG shrugs off the warmth from bright LEDs far better. For the diffuser layer, white or natural filament gives the softest, most even glow.
What does "stencil-compatible" actually mean?
The front of the enclosure is shaped to hold thin stencil sheets, so you can mask letters, icons, or shapes over the 16×16 grid and change the look without reprinting anything.
Why are some of the parts vented?
An LED matrix gets noticeably warm at full brightness. The vented components let that heat escape, which keeps the plastic from warping and helps the panel hold its brightness over long runs.
How many LEDs is a 16×16 matrix?
It packs 256 individually addressable pixels into a compact square, which is plenty for scrolling text, small animations, and simple pixel graphics.
Originally spotted via Adafruit's #3DThursday. Enclosure designed by MyBritishComputerGuy on Thingiverse. Rewritten and expanded for beginners by Flarelab. Source.